
How-To
Getting the most out of Mile 22 transportation products means understanding the basics of rooftop racks, and how to load them. Before you lash your quiver to your rig with your new straps, consider these tips for safe hauling:
- Follow the installation and service instructions provided by your roof rack manufacturer.
- Check rack fasteners and hardware regularly for tightness and strength. Repair or replace broken components immediately BEFORE your next adventure.
- Check the protective padding or wraparound cushions on your roof rack cross members. If they appear dry rotted, severely abused or generally neglected, replace them.
- Inspect your Monster Straps before every adventure for cuts, abrasion, worn stitching, frayed ends or other signs of damage and neglect. We try hard to make every Mile 22 product bullet-proof, but accidents happen. Don't expect anything to last forever, especially if its only job is to endure repeated long exposure to salt water and sunlight.
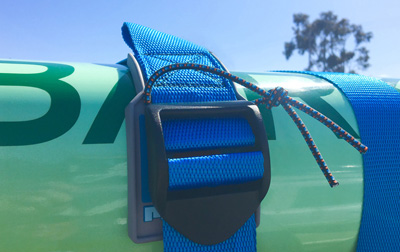
HOW TO INSTALL MONSTER STRAPS
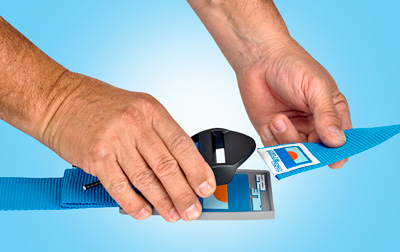
Step 1: Wrap the strap under your crossbars and over your board(s). Put the buckle/pressure pad assembly on the top board and hold in place.
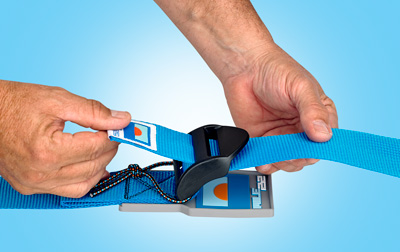
Step 2: Insert the loose end of the strap through the back bar of the buckle. Make sure the entire length of strap circling your gear is free of twists and kinks.
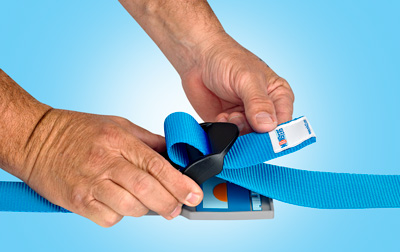
Step 3: Turn the strap end up and over and thread it into the hole on the buckle directly behind the thumb release.
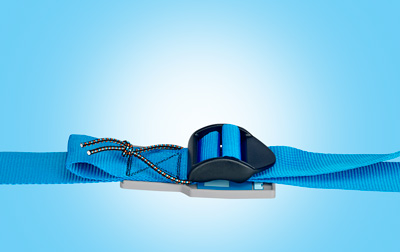
Step 4: Secure your board(s) or gear by slowly but firmly pulling the loose strap end until it tightens into the serrated teeth on the buckle. Hold the buckle/pressure pad assembly with the 2-inch loop behind the double-X-box stitching to keep it in place during this step. Double-check the assembled strap loop around your rack and gear—make sure the strap isn't kinked, and that no part of the strap is rubbing against any sharp edges on the roof rack.
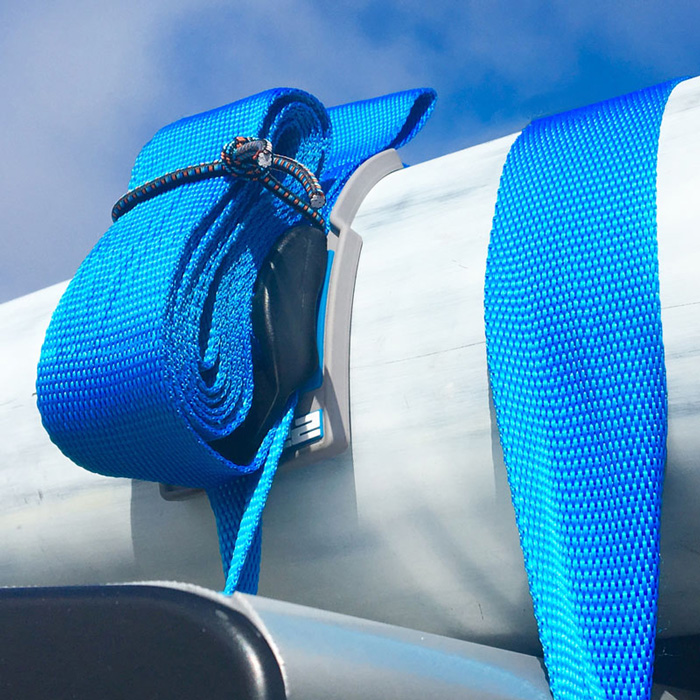
Step 5: Take the excess strap length and roll it up, working toward the buckle, and tuck it under the shock cord loop. This keeps it from flying loose and fraying while in transit.
STRAP REMOVAL AND STORAGE
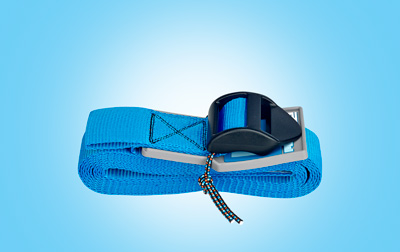
When you're finished transporting your gear, loosen the strap by pulling up on the buckle's thumb tab. Next, roll up the strap and secure the complete loop to the pressure pad/buckle assembly with the shock cord on the strap. If the shock cord is too loose or has stretched out from use, carefully untie the knot, tighten the loop and re-tie the knot.